If you have never used GitHub or git, this guide will help you to get started. We explain how to create a GitHub repository, how to download a GitHub repository locally and how to publish your work and make changes to it. These tasks may sound trivial to experienced developers but for new people it can be really hard to get started because the process is full of developer jargon.
Terminology Simplified
- git
- a program which keeps track of all changes made in a folder and allows synchronizing changes made on different computers without conflicts
- git repository
- a directory of your files together with the change history recorded by git
- GitHub
- a hosting service for git repositories. A copy of your local repository is stored on GitHub's server and git allows you to synchronize the local version with the one stored remotely
How to create a GitHub repository
Before you can create a repository on GitHub, you need to create an account. Follow the steps over here. You will need to pick a username, enter your email and a new password for your GitHub account. When asked to choose a plan, pick the free one. With the free plan you can only create repositories which are publicly available.
-
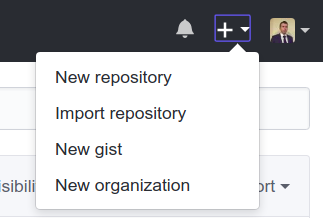
Click the button with a plus icon in the right top corner and select “New repository”.
-
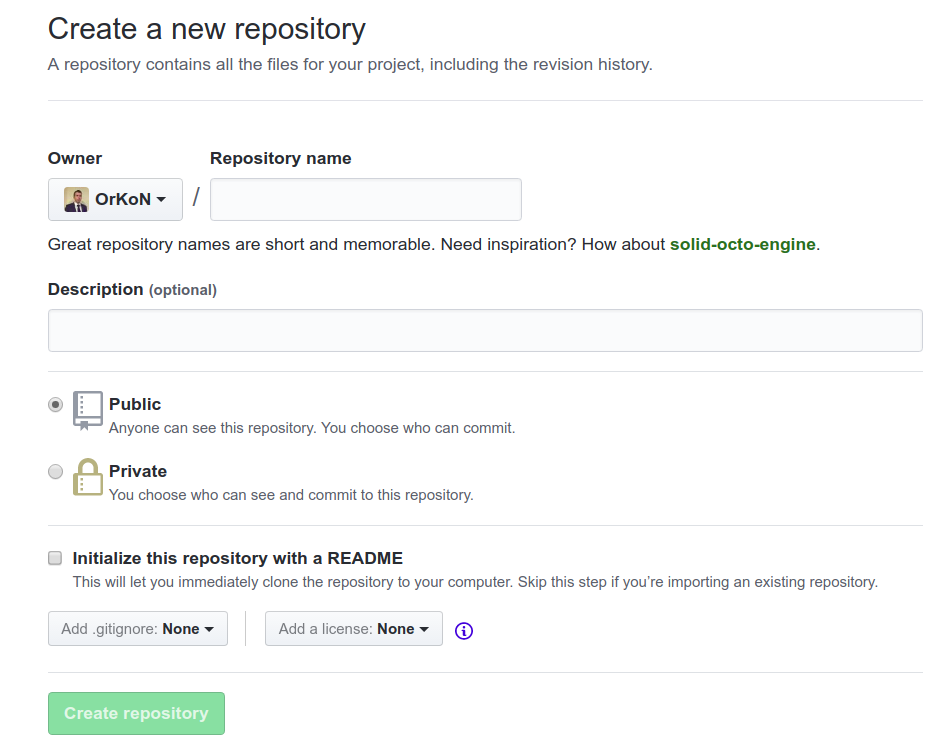
On the page that opens you need to enter a name for your repository. The name should not contain spaces and it is better to avoid special characters.
-
Tick the checkbox “Initilize this repository with a README” and press the “Create Repository” button. If you don’t do this, GitHub will create a completely empty repository which requires additional steps to set up. With this checkbox active GitHub will put a file called
README.mdinside the newly created repository. This file is displayed on the main page of your repository and it is a good place to explain how to work with your repository. After you pressed the “Create Repository” button, you will see a page like this: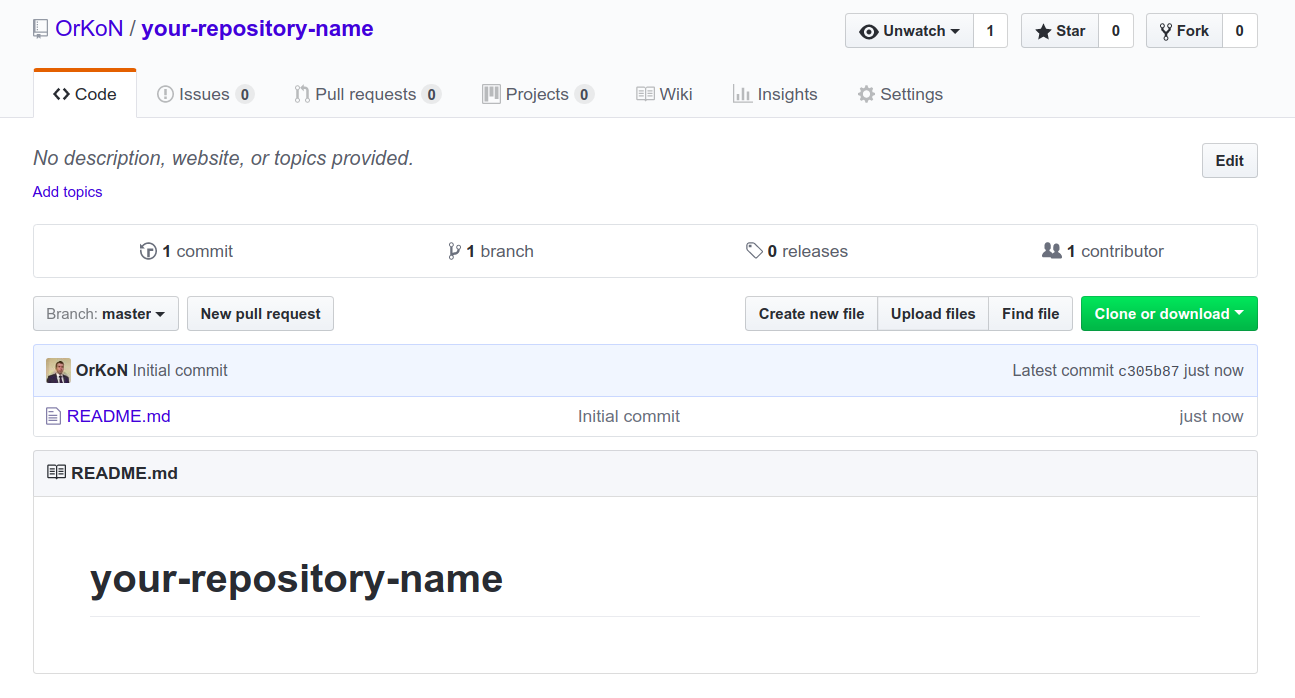
On the page you can see files included into your repo (currently, it is just
README.md) and theREADME.mdcontent display underneath the file list.
At this point your GitHub repository is created but it only exists remotely. You can make changes using GitHub’s UI but in this guide we show your how to download the repository to your compute and publish locally made changes to GitHub.
How to download a GitHub repository
-
on the main page of your repository on GitHub click the “Clone or download” button
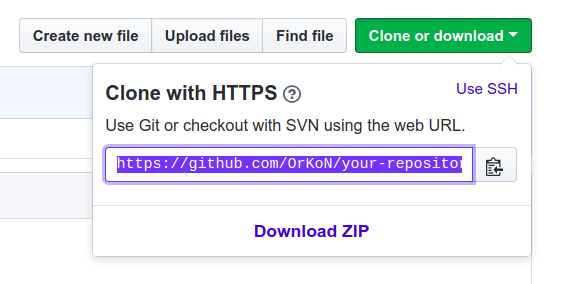
Make sure it says “Clone with HTTPS” in the box that appears. Cloning means that we want download the complete repository and not only the files inside. This way we can track the changes we make locally and afterwards synchronize them with the remote version.
-
copy the URL shown (it looks like
https://github.com/OrKoN/your-repository-name.git) -
open a terminal emulator app on your computer and clone the repository by executing the command
git clone https://github.com/OrKoN/your-repository-name.git. This command will download the repository to the folderyour-repository-nameso you can navigate to it withcd your-repository-name. Now you can make any changes inside this directory which your want to publish on GitHub.
How to publish local changes to GitHub
-
in the terminal emulator app execute
git status. It will output all new changes which your made locally. For example,On branch master Your branch is up-to-date with 'origin/master'. Changes not staged for commit: (use "git add <file>..." to update what will be committed) (use "git checkout -- <file>..." to discard changes in working directory) modified: README.md Untracked files: (use "git add <file>..." to include in what will be committed) myapp.java no changes added to commit (use "git add" and/or "git commit -a")Here you can see that
README.mdhas been modified and that a new filemyapp.javahas been added. -
before publishing to GitHub you need to save the local changes in the local repository. Use
git addto add new files (for example,git add myapp.java). Usegit committo save the changes (for example,git commit -m "New changes").-mparameter allows describing your changes. This is called a commit message and it will be associated with the changes you make. -
Execute
git push origin masterto publish changes to GitHub. If everything goes well, you should see your changes on GitHub now.
Further reading
- you may ignore some files so that they don’t end up in your repository https://help.github.com/articles/ignoring-files/
- learm more about workin with remote repositories https://git-scm.com/book/en/v2/Git-Basics-Working-with-Remotes
- working with GitHub via HTTPs is not the best way. Learn how to set up SSH connection with GitHub https://help.github.com/articles/connecting-to-github-with-ssh/