Update: see the new post explaining how to add comments using the official plugin for Gatsby: https://just-comments.com/blog/2019-07-30-adding-comments-to-gatsby-js.html
Static sites are great! They are easy to publish and maintain. You can scale a static website easily for millions of users. And hosting is normally quite cheap. Another advantage is the convenience of local development and and the possibility to preview any change before publishing. One of the challenges of static websites is adding dynamic content to the site. In this post, I will show you an easy way to add a comments widget to a static website based on GatsbyJS using Just Comments.
Creating a new blog with GatsbyJS’ blog starter
Skip this section if you already have a blog with Gatsby. For those who don’t have one, let’s start with installing GatsbyJS:
npm install --global gatsby-cli
Create a new blog with the name “blog-with-comments”:
gatsby new blog-with-comments https://github.com/gatsbyjs/gatsby-starter-blog
Change the directory to blog-with-comments and start GatsbyJS in development mode. This will spin up a development server and you will be able to see the blog at http://localhost:8000
npm start
Adding comments to GatsbyJS blog
Now when we have a basic blog we can add comments so that your visitors can comment on your content.
First, create an account at Just Comments by logging in via Github or Facebook. You will see an API key created for you once you log in.
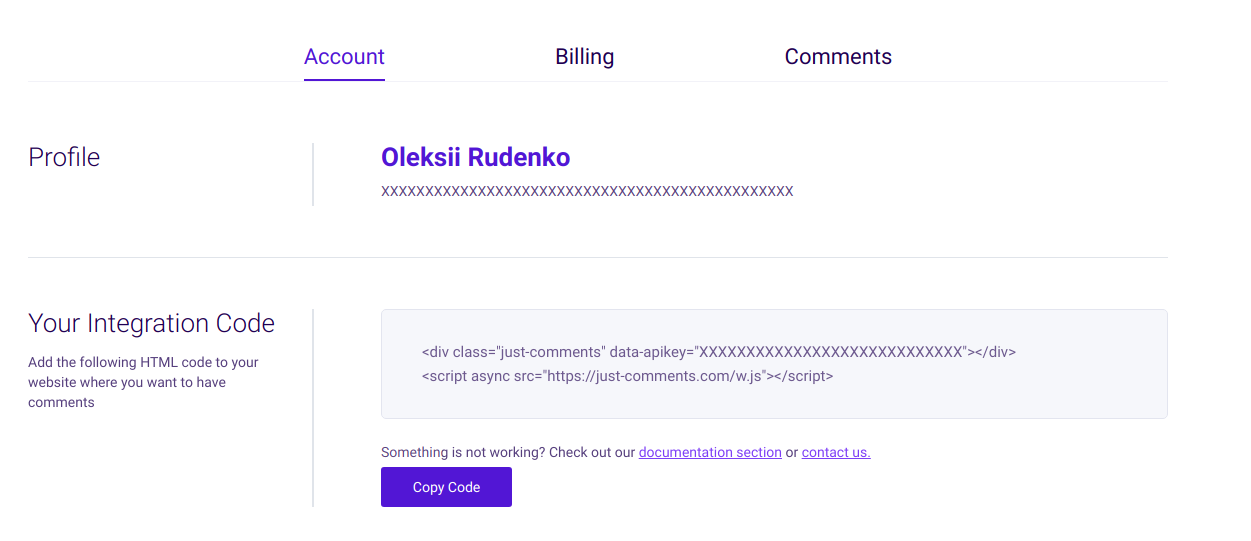
Now we need to modify the blog template and integrate the widget into our blog. Open the file src/templates/blog-post.js in your favorite editor. Add the following class to the file:
class JustComments extends React.Component {
  constructor(...args) {
    super(...args)
    this.ref = React.createRef()
  }
  render() {
    return (
      <div
        ref={this.ref}
        className="just-comments"
        data-apikey="YOUR_API_KEY"
      />
    )
  }
  componentDidMount() {
    const s = document.createElement('script')
    s.src = '//just-comments.com/w.js'
    s.setAttribute('data-timestamp', +new Date())
    this.ref.current.appendChild(s)
  }
}
Replace YOUR_API_KEY with the actual API key for your Just Comments account. By adding the script tag, we embed the widget provided by Just Comments which will power our comments.
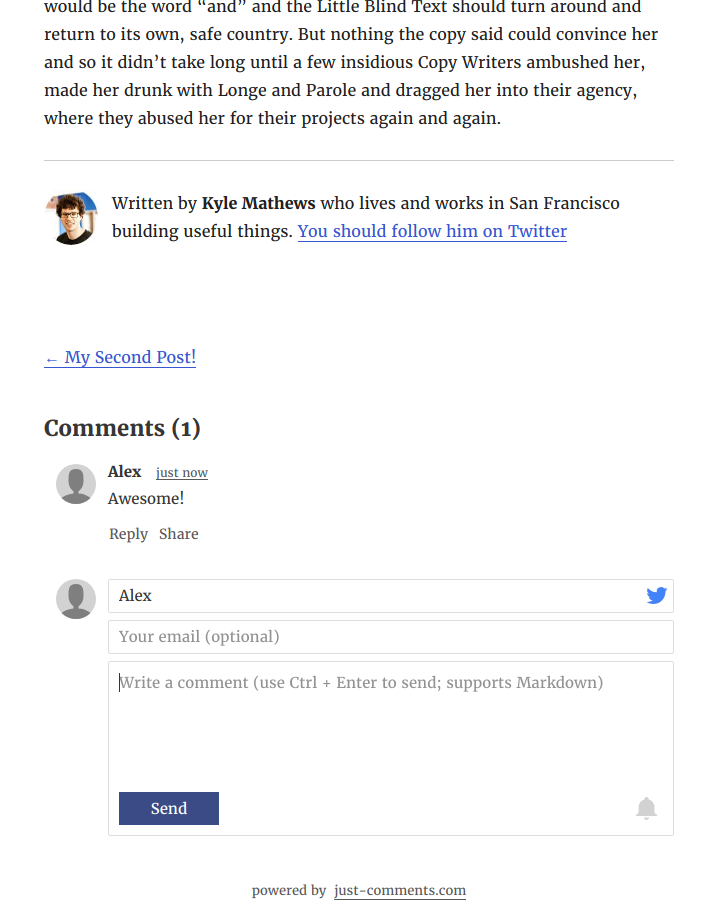
Second, place the container element for the comments where you want it to be. I add it right after the <ul> tag in the same file src/templates/blog-post.js.
<JustComments />
The end result looks something like this:
About Just Comments
Just Comments is a service offering a comment system. It’s not completely free but it’s almost free for small web sites which don’t get millions of visitors. Just Comments charges you for a so called comment pageview and one comment pageview costs as little as $0.00001, or $10 for 1,000,000 pageviews. Read more about Just Comments’ pricing and possible integrations at https://just-comments.com/